
Are you looking to take your Laravel blog to the next level by injecting dynamic content? Do you want to make your code more flexible and reusable? Look no further! In this step-by-step guide, we'll show you how to use the powerful combination of the Spatie Laravel Markdown package and Livewire components to render custom Livewire components in markdown for your Laravel project.
In today's web applications, dynamic content is essential for engaging user experiences. With the Spatie Laravel Markdown package, you can leverage the simplicity of Markdown while injecting dynamic Livewire components into your blog. Livewire components provide interactivity and real-time updates without the need for complex JavaScript frameworks.
Throughout this guide, we'll walk you through the process of integrating the Spatie Laravel Markdown package, creating a custom Livewire component, and injecting it into your markdown content. By the end, you'll have the knowledge and tools to create interactive and dynamic content in your Laravel blog.
So, let's dive in and explore how you can bring your Laravel blog to life with dynamic Livewire components using the Spatie Laravel Markdown package!
For this example we are using Laravel 10 and Livewire 2.
Getting Started with Spatie Laravel Markdown Package
The Spatie Laravel Markdown package Is a Laravel package that provides a set of tools to easily render markdown content in your Laravel project.
The package contains a Blade component that you can use to render markdown content in your views. It also provides a MarkdownRenderer class that you can use to programmatically convert markdown content to HTML.
It uses Shiki internally to highlight code blocks. Shiki is a blazing-fast syntax highlighter that supports over 100 languages and themes. And it's highly customizable, so you can easily tweak it to your needs.
You can install it by running the following command:
composer require spatie/laravel-markdown
and to enable the syntax highlighting, you need to install shiki by running the following command:
npm install shiki
Creating the Livewire Component
But first, what is Livewire? Livewire is a full-stack framework designed specifically for Laravel, enabling developers to build dynamic interfaces seamlessly within the Laravel ecosystem. With Livewire, you can create modern, reactive, and dynamic interfaces without relying on a separate JavaScript framework like Vue.js. Instead, you can leverage the power of Laravel Blade as your templating language.
Livewire simplifies the process of building dynamic interfaces by allowing you to write Laravel code directly in your Blade templates. This means you can utilize familiar Laravel features, such as components, routing, and data handling, to create interactive user experiences. Livewire handles the necessary behind-the-scenes processes, such as handling user input, updating the interface, and maintaining state, all without the need for writing custom JavaScript code.
Now we know that. Let’s say we want to add a new article about the space and you want to make it interactive by adding a likes counter. To do that, we'll first create a new Livewire component called Counter:
<?php

namespace App\Http\Livewire;

use Livewire\Component;

class Counter extends Component
{
    public $count = 0;

    public $disabled = false;

    public function mount()
    {
        $this->count = rand(0, 10000);
    }

    public function increment()
    {
        $this->count++;
        $this->disabled = true;
    }

    public function render(): string
    {
        return <<<'blade'
            <div class="flex justify-center items-center gap-2">
                <button
                    class="bg-rose-500 text-white font-extrabold h-10 w-10 rounded-full disabled:opacity-50"
                    wire:click="increment"
                    {{ $disabled ? 'disabled' : '' }}
                >
                    +1
                </button>
                <p class="text-2xl font-bold">{{ $count }}</p>
            </div>
        blade;
    }
}
Let's break down the Livewire component step by step:
The
Counterclass extends theComponentclass provided by the Livewire package. This means that theCounterclass inherits all the functionality of theComponentclass and can add its own specific behavior.Inside the
Counterclass, there are three public properties:$count,$disabled, and$message. These properties hold the state of the counter and whether the button is disabled or not. The initial value of$countis set to 0, and the initial value of$disabledis set to false.The
mountmethod is a special method in Livewire components that is called when the component is first initialized. In this case, we want to generate a random number between 0 and 10,000 and assign it to the$countproperty just for the sake of the example.The
incrementmethod is called when the user clicks on the button. It increments the value of the$countproperty by 1 and sets the$disabledproperty to true.The
rendermethod is another special method in Livewire components. It is responsible for rendering the HTML that represents the component. In this case, we use a<<<'blade'syntax to define a multi-line string that contains the HTML markup. The{{ $count }}and{{ $disabled ? 'disabled' : '' }}are placeholders that will be replaced with the actual values of the$countand$disabledproperties.The rendered HTML consists of a
<div>element with a button and a paragraph. The button has a CSS class and a Livewire directive (wire:click) that triggers the increment method when clicked. The button is also conditionally disabled based on the value of the$disabledproperty. The paragraph displays the value of the$countproperty.
Now let's see how we can use this Livewire component in our markdown content.
Injecting the Livewire Component in Markdown
In the markdown content, we'll use the @livewire Blade directive to render the Livewire component. The @livewire directive accepts the name of the Livewire component as its first argument and an optional array of attributes as its second argument. Here is an example of how it would look:
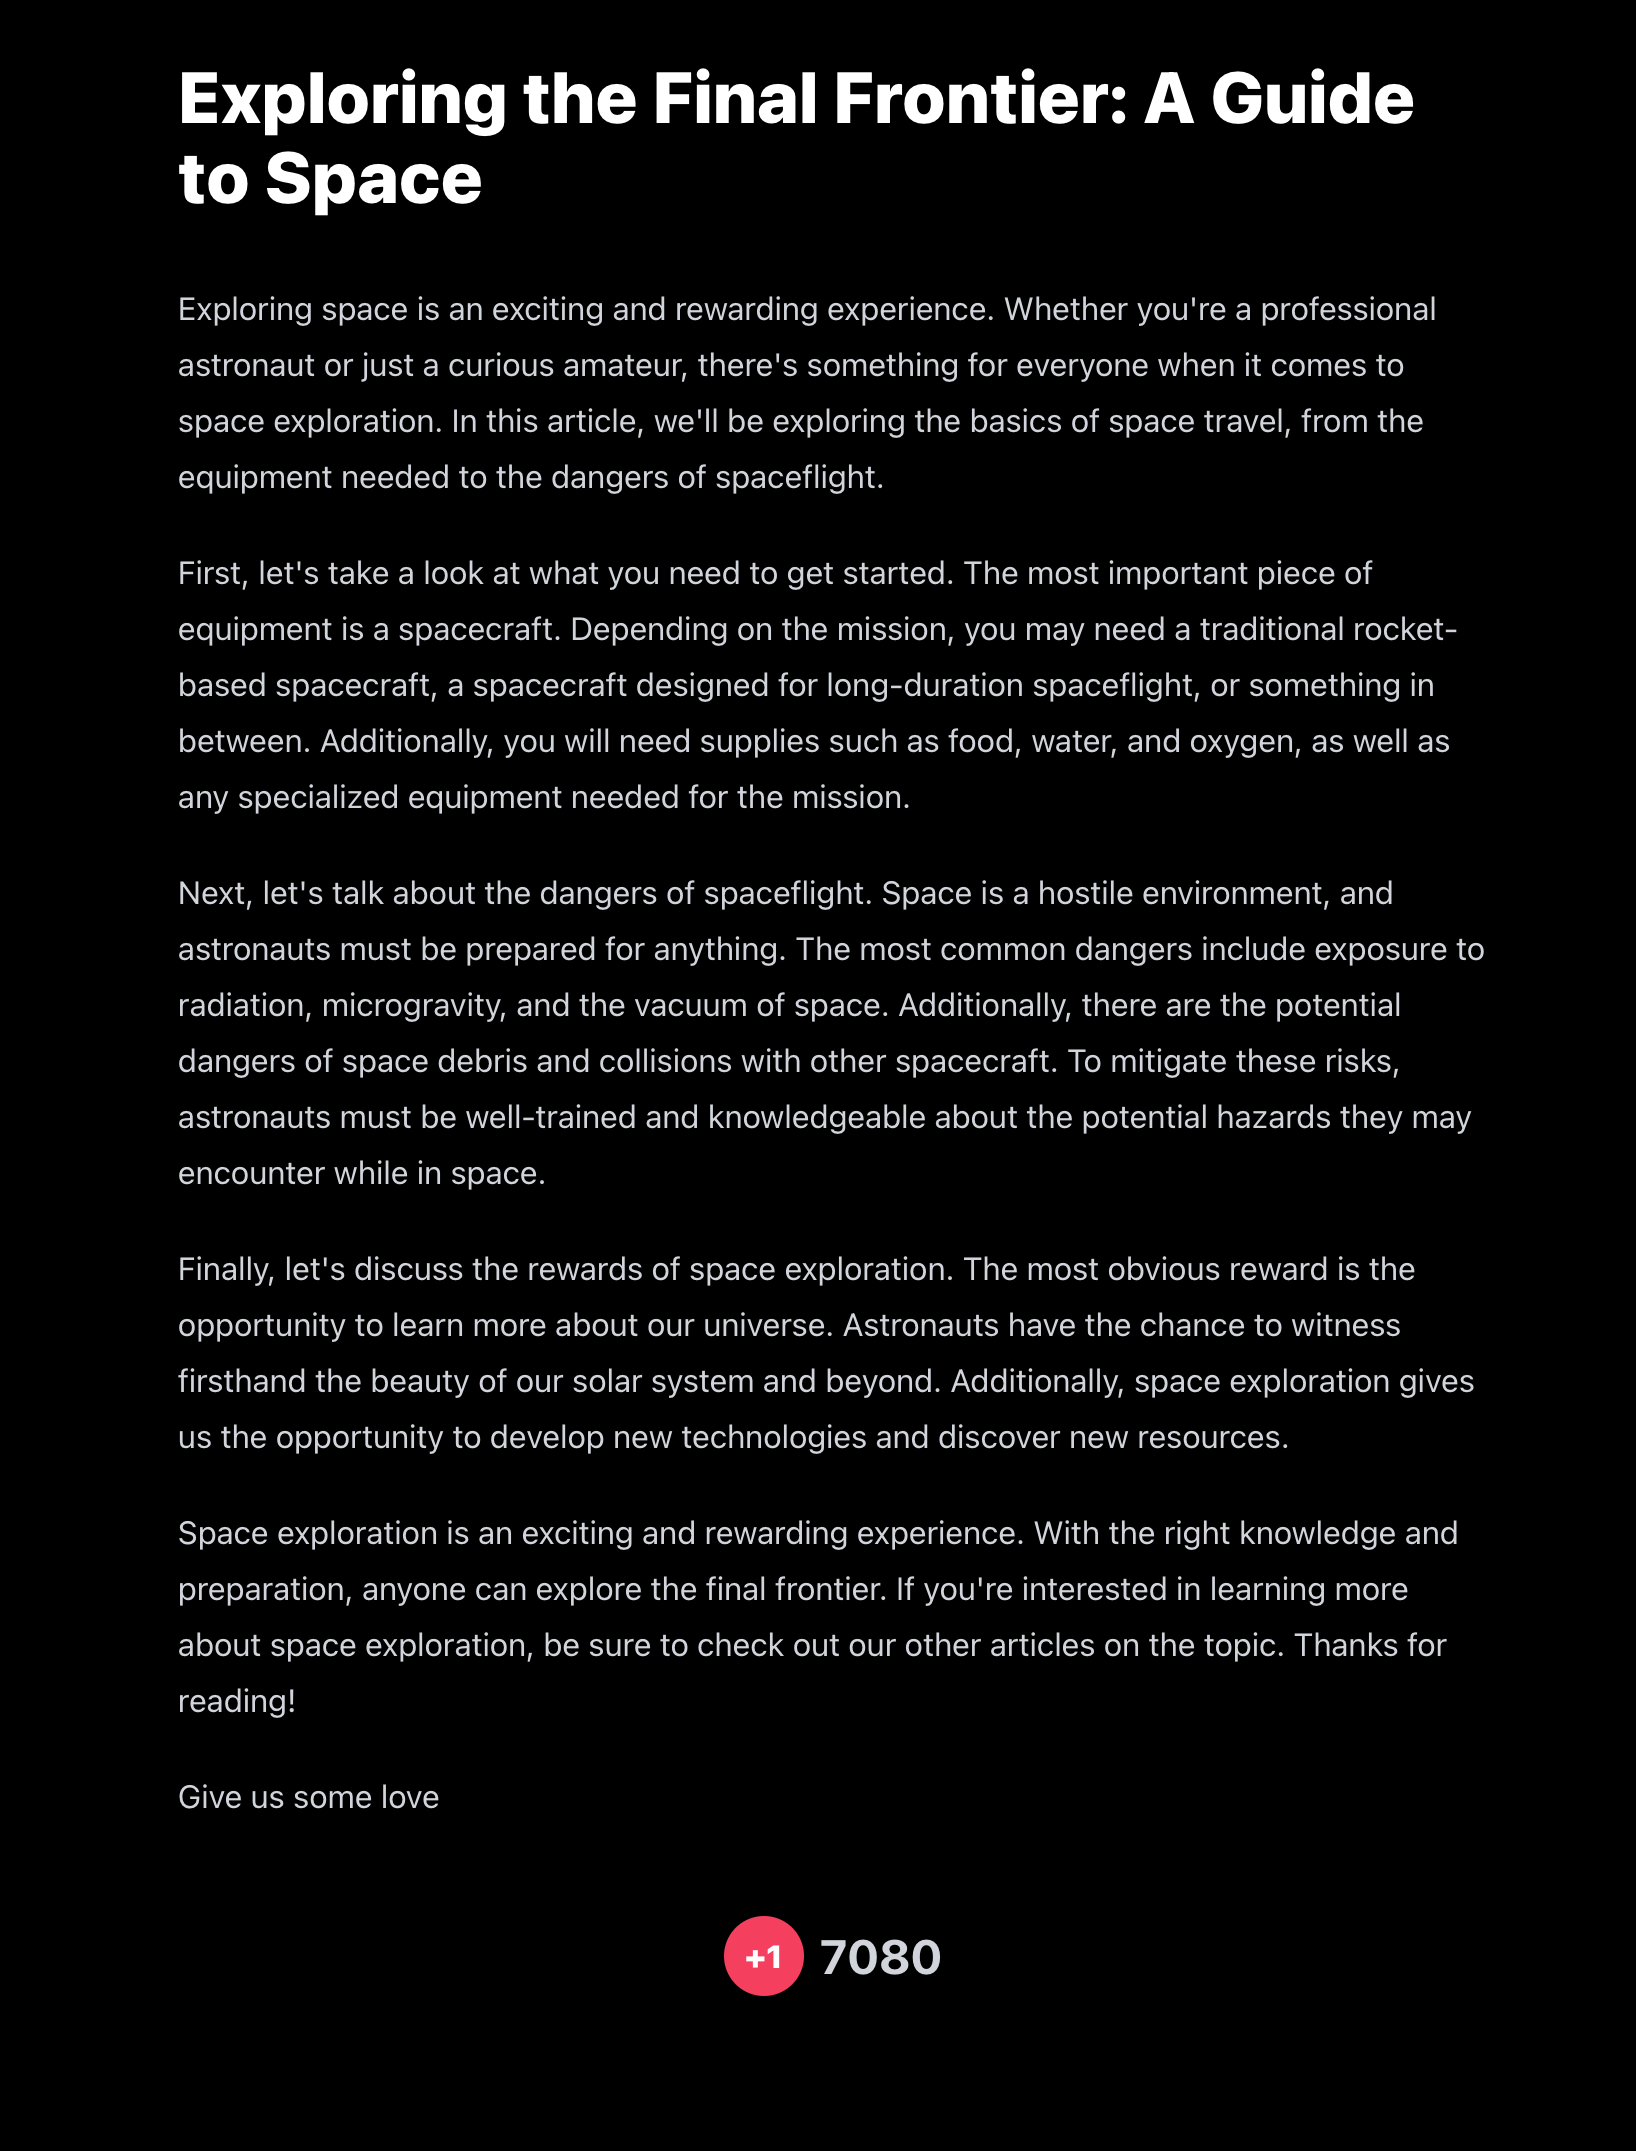
# Exploring the Final Frontier: A Guide to Space

Exploring space is an exciting and rewarding experience. Whether you're a professional astronaut or just a curious amateur, there's something for everyone when it comes to space exploration. In this article, we'll be exploring the basics of space travel, from the equipment needed to the dangers of spaceflight.

First, let's take a look at what you need to get started. The most important piece of equipment is a spacecraft. Depending on the mission, you may need a traditional rocket-based spacecraft, a spacecraft designed for long-duration spaceflight, or something in between. Additionally, you will need supplies such as food, water, and oxygen, as well as any specialized equipment needed for the mission.

Next, let's talk about the dangers of spaceflight. Space is a hostile environment, and astronauts must be prepared for anything. The most common dangers include exposure to radiation, microgravity, and the vacuum of space. Additionally, there are the potential dangers of space debris and collisions with other spacecraft. To mitigate these risks, astronauts must be well-trained and knowledgeable about the potential hazards they may encounter while in space.

Finally, let's discuss the rewards of space exploration. The most obvious reward is the opportunity to learn more about our universe. Astronauts have the chance to witness firsthand the beauty of our solar system and beyond. Additionally, space exploration gives us the opportunity to develop new technologies and discover new resources.

Space exploration is an exciting and rewarding experience. With the right knowledge and preparation, anyone can explore the final frontier. If you're interested in learning more about space exploration, be sure to check out our other articles on the topic. Thanks for reading!

Give us some love

@livewire('counter')
Now, let's say we store this article on the database and we want to render it on the frontend. First, we'll retrieve the article from the database, we get the article body, and then, we use the MarkdownRenderer::toHTML() method to convert the article body to HTML. Finally, we use the Blade::render() method to render the custom Livewire component in the resulting HTML. Here is an example of how it would look:
<?php

use App\Models\Article;
use Illuminate\Support\Facades\Route;
use Spatie\LaravelMarkdown\MarkdownRenderer;

Route::get('/', function () {
    $article = Article::findBySlug('create-counter-in-livewire');

    $html = app(MarkdownRenderer::class)
        ->highlightTheme('dracula')
        ->toHtml($article->body);

    return Blade::render(
        "
            @extends('welcome')
            @section('content')
                {$html}
            @endsection
        "
    );
});
This code will render the @livewire('counter') component in the resulting HTML. And the final result:
Conclusion
Congratulations! You've now learned how to inject dynamic content into your Laravel blog using the Spatie Laravel Markdown package and Livewire components. By following this step-by-step guide, you've gained the knowledge and skills to create interactive and engaging experiences for your readers.
With the power of the Spatie Laravel Markdown package, you can easily render custom Livewire components directly in your markdown content. This allows you to create dynamic features such as like counters, comment sections, and more, without the need for complex JavaScript frameworks.
By leveraging the simplicity of Markdown and the interactivity of Livewire, you can make your code more flexible and reusable, saving time and effort in your development process. Your blog will stand out with its dynamic and engaging content, keeping your readers coming back for more.
We encourage you to start implementing the techniques discussed in this guide and explore the endless possibilities of injecting dynamic content in your Laravel blog. Don't hesitate to experiment and customize your Livewire components to fit your unique needs and branding.
Remember, the Spatie Laravel Markdown package and Livewire offer ongoing support and active communities to help you along your journey. If you have any questions or need further assistance, be sure to check out their official documentation and resources available.
Thank you for reading, and happy coding!
Discover more resources and stay connected with us:
- Official documentation of the Spatie Laravel Markdown package: Laravel Markdown docs.
- Official documentation of Livewire: Livewire docs.
- Follow us on Twitter for updates and tips: @moonguard_dev, @quetteman.
- Do you want to learn how to implement custom collections in laravel? Take the next step with our comprehensive guide: Custom Collections in Laravel.
- Discover how to create your own distributable Filament admin panel with our book "MoonGuard: The Software Creator’s Journey".