
Recently, I had to create a simple settings page to manage general settings for a website with Filament. Filament is a Laravel-based admin panel that provides an intuitive interface for managing your application's data.
In this blog post, I'll walk you through the steps I took to create the settings page, including how to use migrations to store the data, how to update the settings from the Filament admin panel, and how to dynamically build the edit form depending on the setting type.
Creating the Settings Table
First, we need to create a settings table to store the data. We'll use migrations to create the table with the necessary columns. Instead of using an id column, we'll use key as a primary column, which will make it easier to identify the settings. We'll also include columns for the label, value, type, and attributes. We'll also create multiple settings to be able to test. Here's the content of the migration file:
<?php

use App\Models\Setting;
use Illuminate\Database\Migrations\Migration;
use Illuminate\Database\Schema\Blueprint;
use Illuminate\Support\Facades\Schema;

return new class extends Migration
{
    /**
     * Run the migrations.
     */
    public function up(): void
    {
        Schema::create('settings', function (Blueprint $table) {
            $table->string('key')->primary();
            $table->string('label');
            $table->text('value')->nullable();
            $table->json('attributes')->nullable();
            $table->string('type');

            $table->timestamps();
        });

        Setting::create([
            'key' => 'site_name',
            'label' => 'Site Name',
            'value' => null,
            'type' => 'text',
        ]);

        Setting::create([
            'key' => 'basic_plan_price',
            'label' => 'Basic Plan Price',
            'value' => 1000,
            'type' => 'number',
        ]);

        Setting::create([
            'key' => 'pro_plan_price',
            'label' => 'Pro Plan Price',
            'value' => 2000,
            'type' => 'number',
        ]);

        Setting::create([
            'key' => 'environment',
            'label' => 'Environment',
            'value' => 'production',
            'type' => 'select',
            'attributes' => [
                'options' => [
                    'production' => 'Production',
                    'staging' => 'Staging',
                    'local' => 'Local',
                ],
            ],
        ]);
    }

    /**
     * Reverse the migrations.
     */
    public function down(): void
    {
        Schema::dropIfExists('settings');
    }
};
Creating the Setting Model
Next, we need to create a Setting model to interact with the settings table. As we are using a non-standard column as the primary key, we need to customize the model a little bit. We set the $primaryKey attribute to key which is the name of our primary column, and we also set $incrementing attribute to false so Laravel doesn't automatically set our primary key with an incrementing integer. We also cast the attributes column as an array as this is a json column.
<?php

namespace App\Models;

use Illuminate\Database\Eloquent\Model;

class Setting extends Model
{
    protected $primaryKey = 'key';

    public $incrementing = false;

    protected $fillable = [
        'key',
        'label',
        'value',
        'type',
        'attributes',
    ];

    protected $casts = [
        'attributes' => 'array',
    ];
}
Creating the Filament Resource
With the settings table and Setting model in place, we can now create a Filament resource to manage our settings. We can use the make:filament-resource command to create the resource:
php artisan make:filament-resource Settings --simple
We use the --simple option to manage our settings on one page using modals. This command will create two files, ManageSettings.php and SettingsResource.php.
In ManageSettings.php, we remove the getActions() method because we don't need it in our case.
<?php

namespace App\Filament\Resources\SettingsResource\Pages;

use App\Filament\Resources\SettingsResource;
use Filament\Resources\Pages\ManageRecords;

class ManageSettings extends ManageRecords
{
    protected static string $resource = SettingsResource::class;
}
In SettingsResource.php, we update the $model attribute with the Setting model class and namespace.
<?php

namespace App\Filament\Resources;

use App\Models\Setting;
use Filament\Resources\Resource;

class SettingsResource extends Resource
{
    protected static ?string $model = Setting::class;

    protected static ?string $navigationIcon = 'heroicon-o-collection';

    //...
}
We also override the canCreate() method to set it to false because we don't want to create settings from the control panel.
<?php

namespace App\Filament\Resources;

use App\Models\Setting;
use Filament\Resources\Resource;

class SettingsResource extends Resource
{
    //...

    public static function canCreate(): bool
    {
        return false;
    }

    //...
}
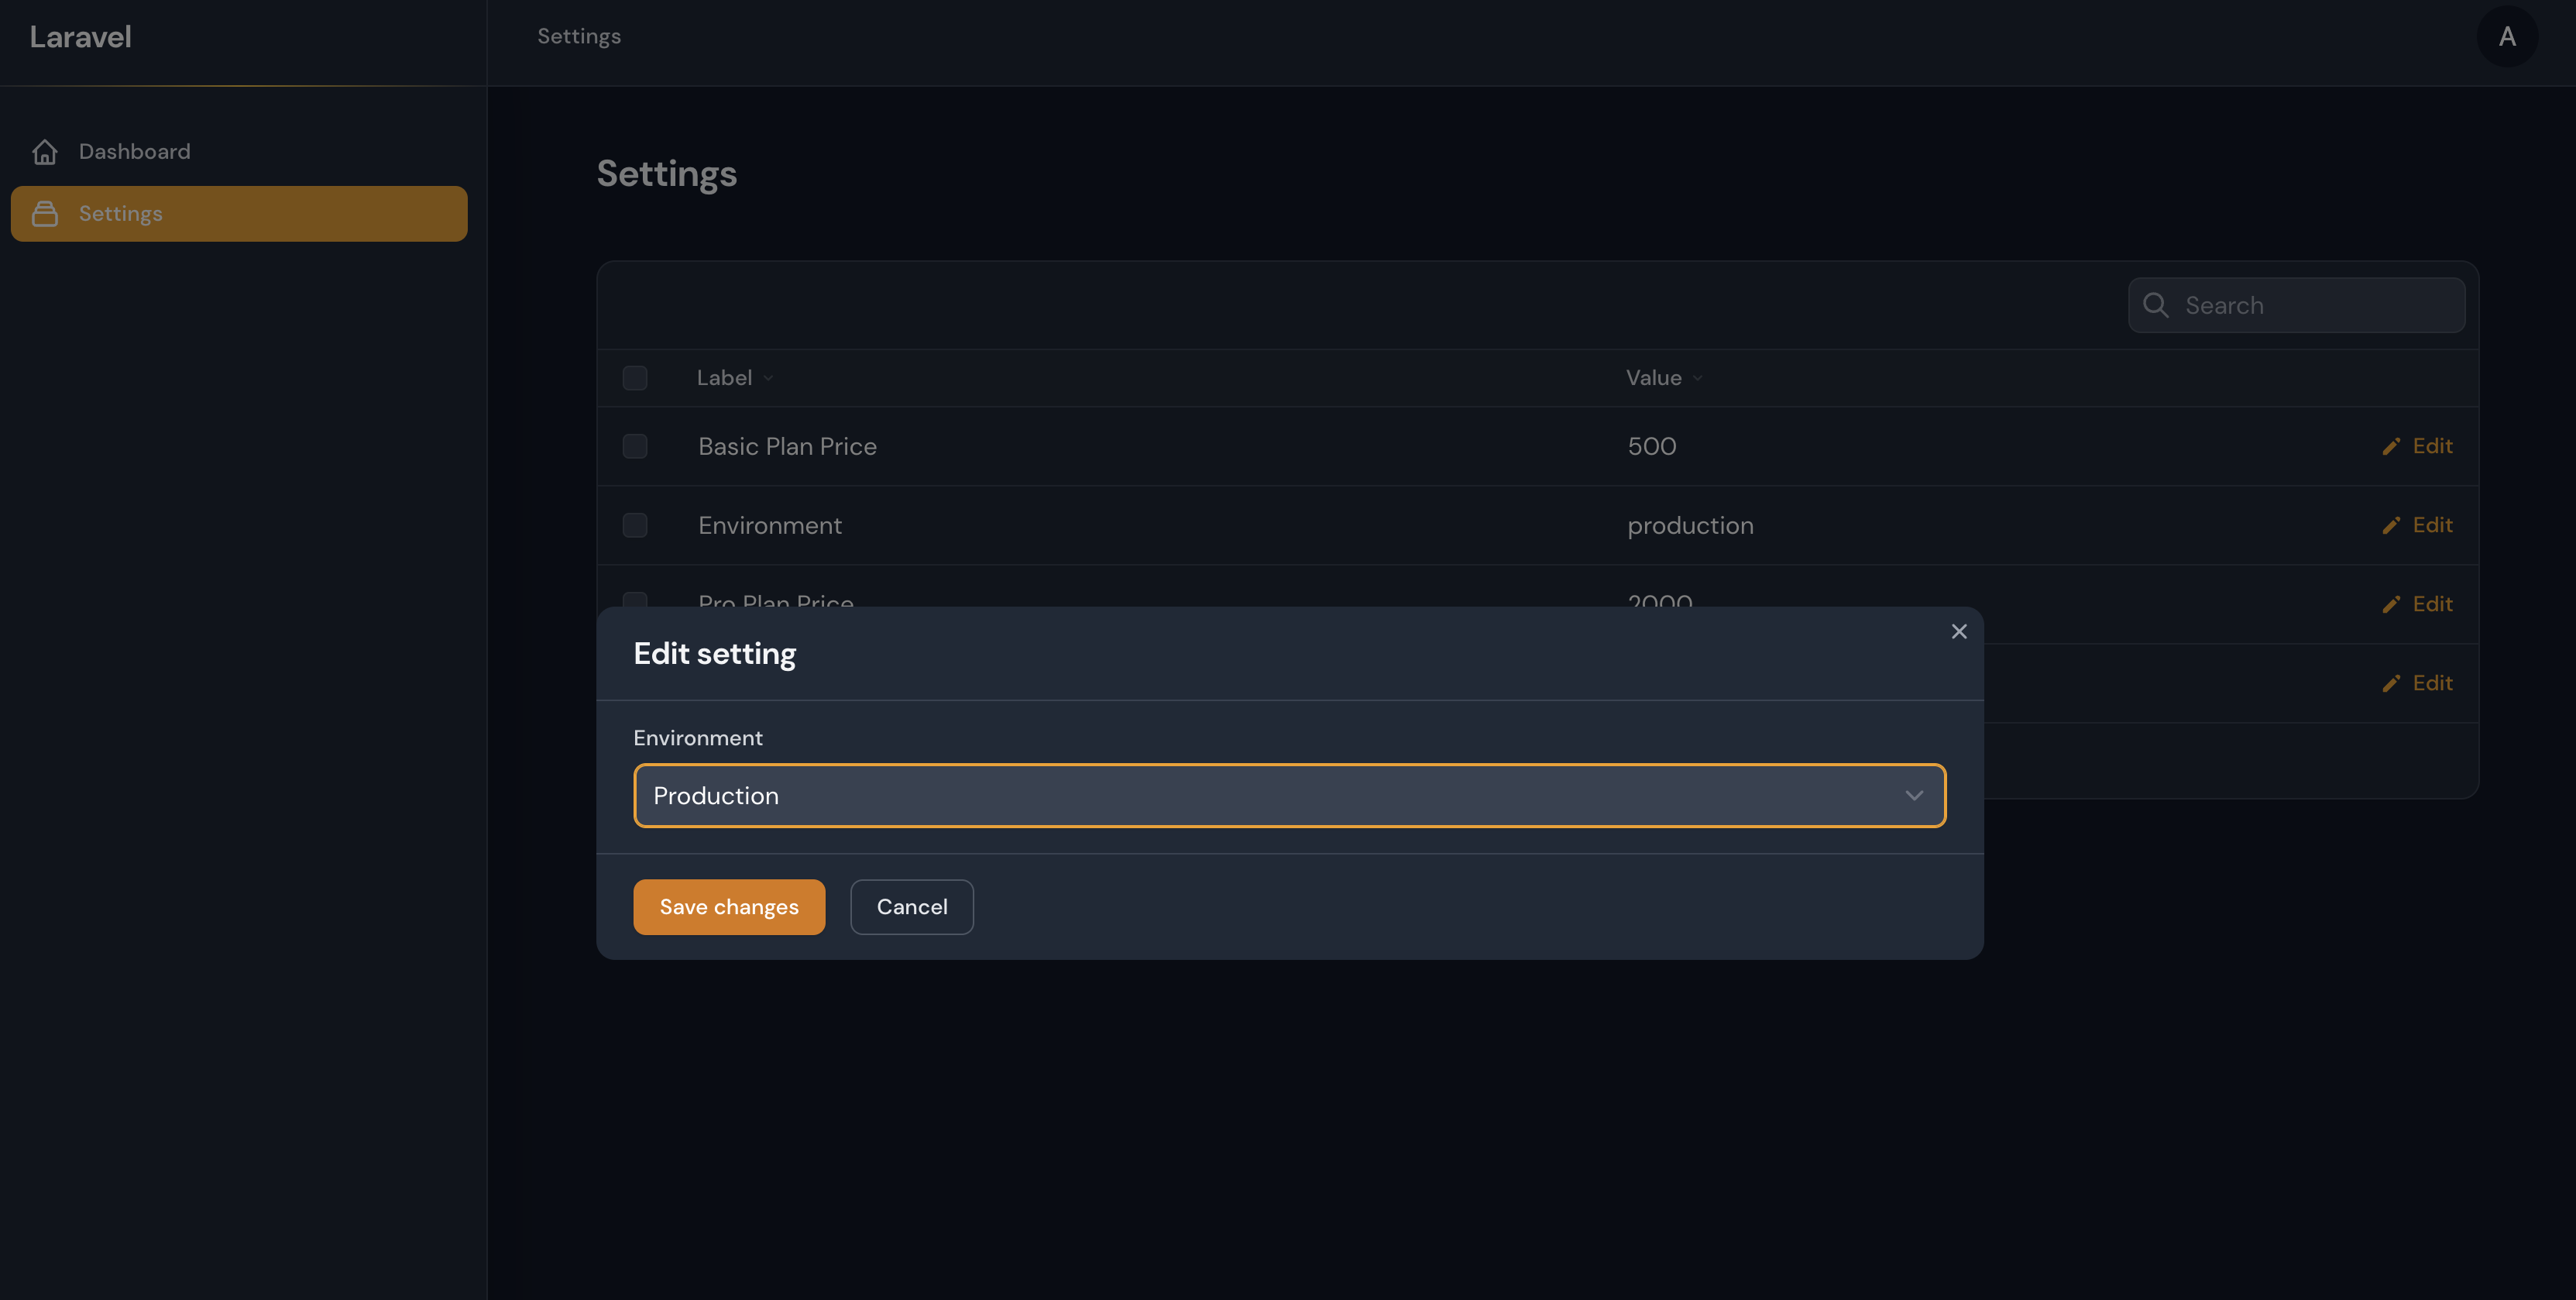
In the table() method, we define the columns we want to display in the settings table. We make the label and value columns sortable and searchable, and we use the formatStateUsing() method to show Empty when the value is null. We also customize the EditAction with a custom form by adding the form() method. Depending on the setting type, we return the correct input.
<?php

namespace App\Filament\Resources;

use App\Filament\Resources\SettingsResource\Pages;
use App\Models\Setting;
use Filament\Forms\Components\Select;
use Filament\Forms\Components\TextInput;
use Filament\Resources\Resource;
use Filament\Resources\Table;
use Filament\Tables;

class SettingsResource extends Resource
{
    //...

    public static function table(Table $table): Table
    {
        return $table
            ->columns([
                Tables\Columns\TextColumn::make('label')
                    ->sortable()
                    ->searchable(),

                Tables\Columns\TextColumn::make('value')
                    ->formatStateUsing(fn ($state) => $state === null ? 'Empty' : $state)
                    ->sortable()
                    ->searchable(),
            ])
            ->actions([
                Tables\Actions\EditAction::make()
                    ->form(function (Setting $record) {
                        return match ($record->type) {
                            'select' => [
                                Select::make('value')
                                    ->label($record->label)
                                    ->options($record->attributes['options'])
                            ],
                            'number' => [
                                TextInput::make('value')
                                    ->label($record->label)
                                    ->type('number')
                            ],
                            default => [
                                TextInput::make('value')
                                    ->label($record->label)
                            ]
                        };
                    }),
            ]);
    }

    //...
}
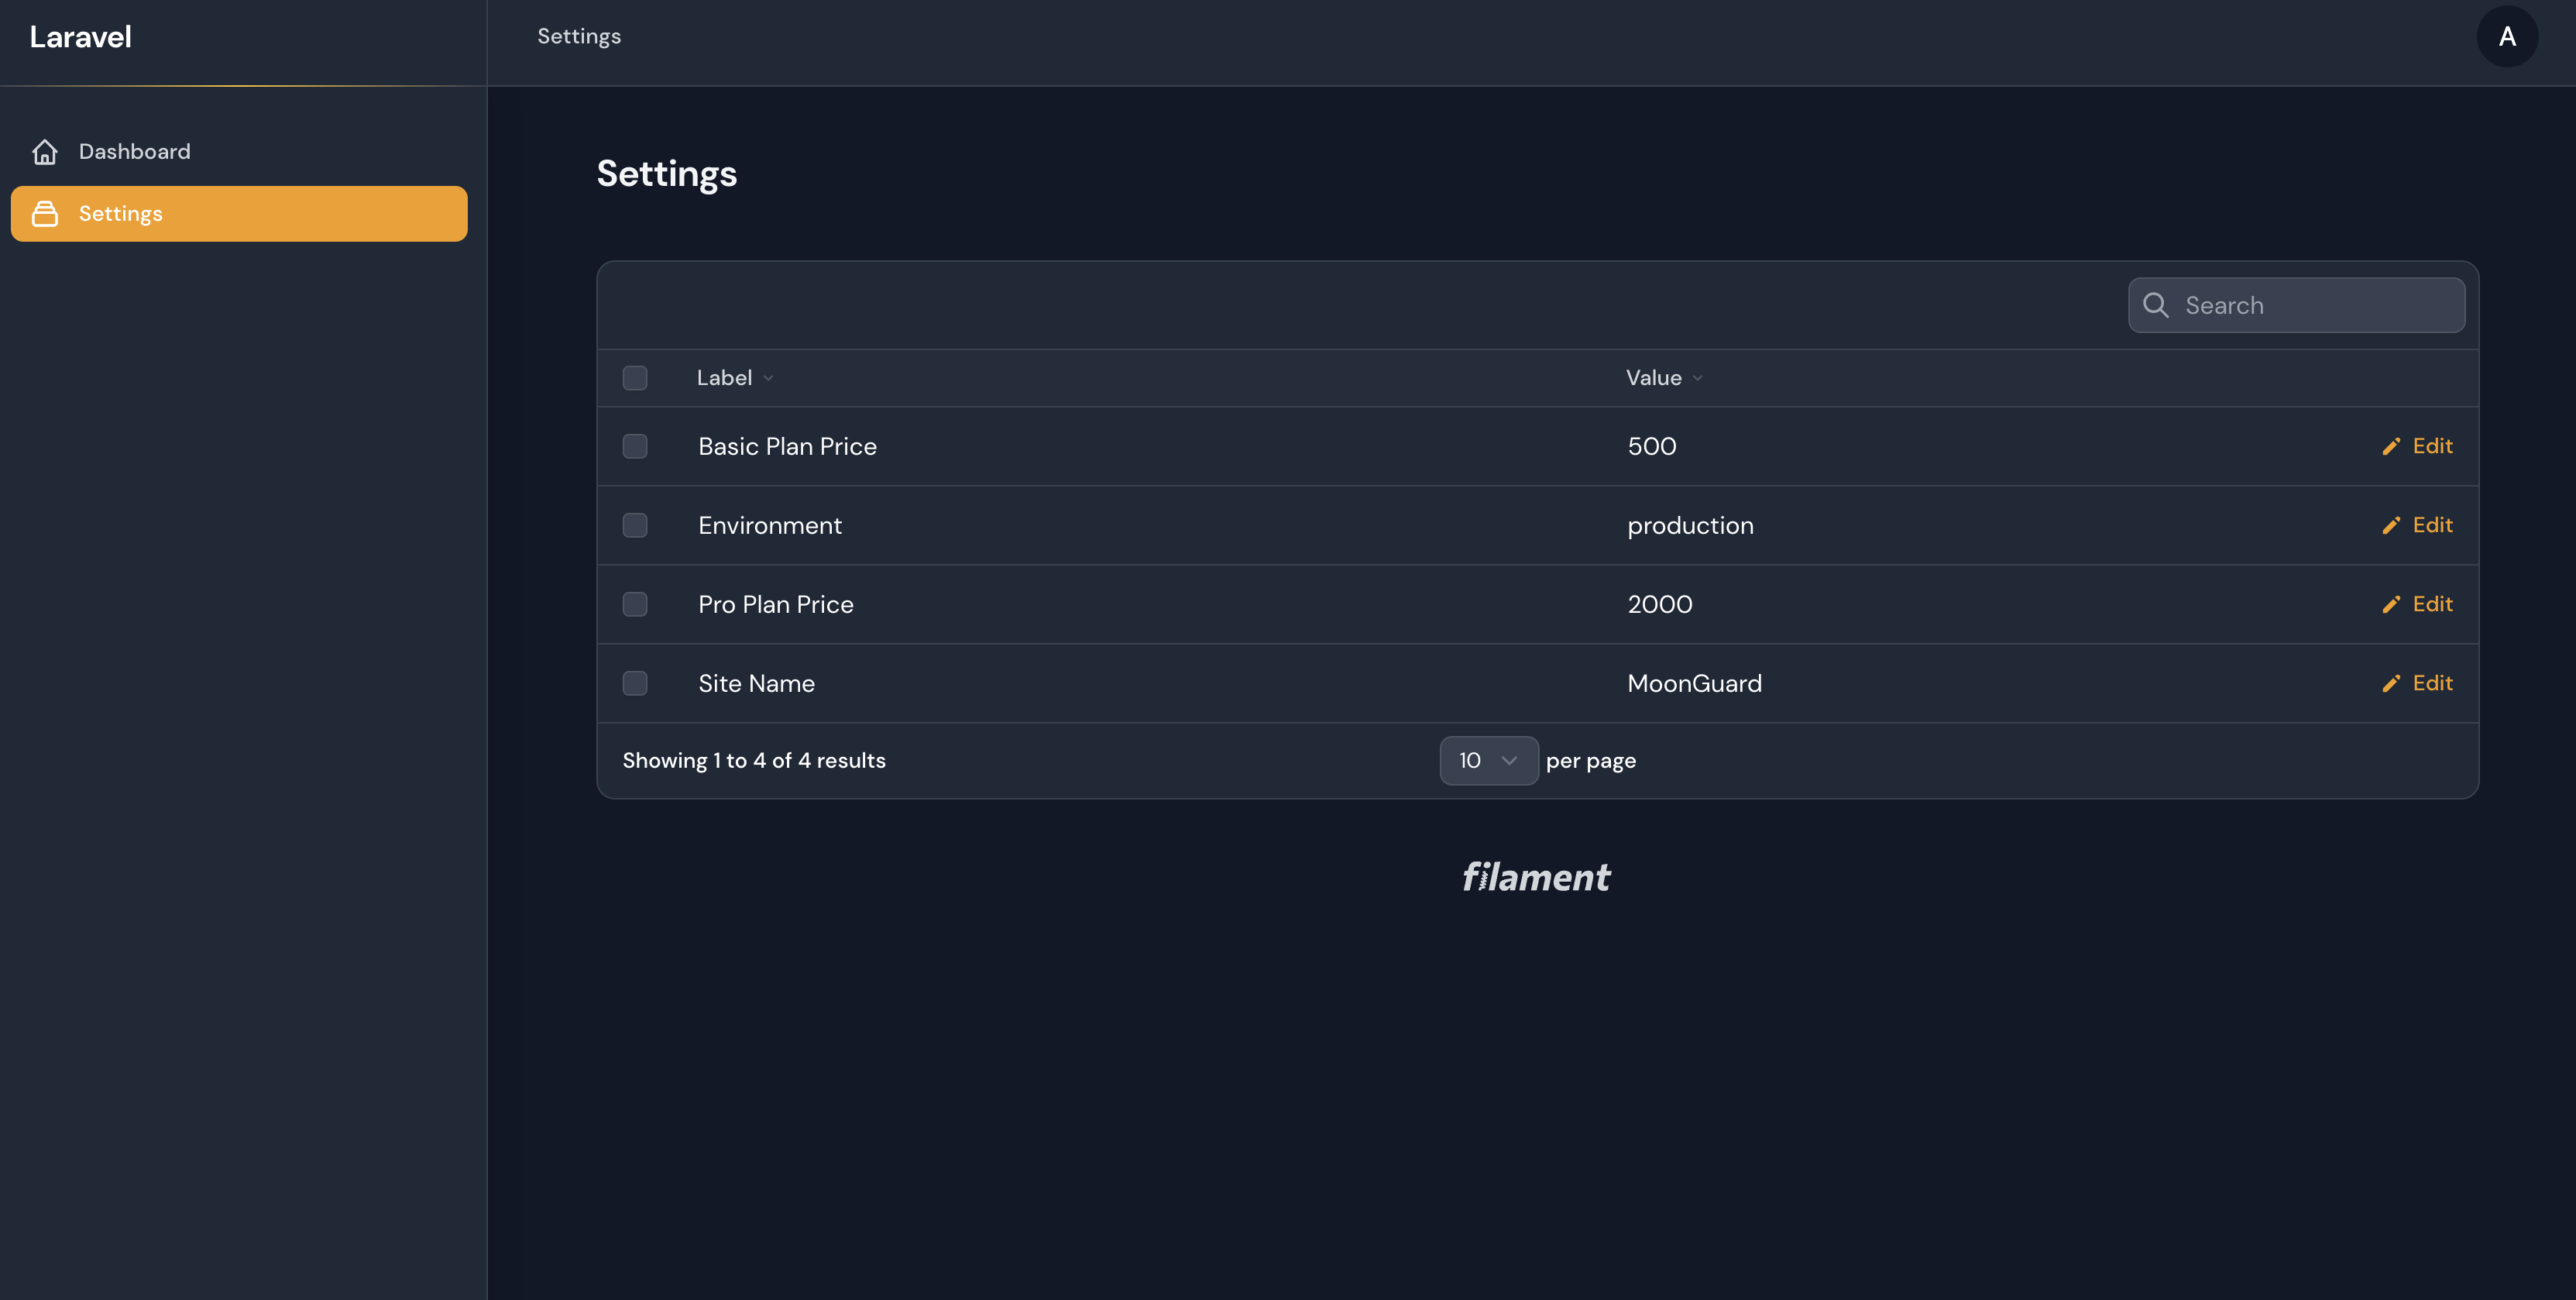
The final result
Go to the settings page in the control panel and you should see something like this:
Conclusion
And that's it! With Filament, creating a simple settings page is a breeze. By using migrations to create the settings table, the Setting model to interact with the table, and Filament to create the resource to manage the settings, we can easily update the settings from the admin panel. And with the ability to dynamically build the edit form depending on the setting type, we can ensure that the user interface is intuitive and easy to use.
I hope this post was helpful in showing you how to create a simple settings page with Filament. If you have any questions or comments, feel free to leave them below!
Krater: Debugging Laravel
Before you go, have you heard about our latest product, Krater?
Krater is a cross-platform desktop application designed as a solution for Laravel developers looking to improve and enhance their debugging experience. If your daily job consists of working with Laravel, you should definitely check this out. You can download Krater here.
We've also released an article about Krater that you might find interesting.
MoonGuard: The Software Creator's Journey
Discover the secrets behind our successful software with our book "MoonGuard: The Software Creator’s Journey" to learn how to create successful Laravel package from scratch! In addition to our website, we also maintain an active presence on Twitter (@moonguard_dev). By following us on Twitter, you'll be the first to know about any breaking news or important announcements regarding MoonGuard. So be sure to check us out and stay connected!